Navigation
Install the app
How to install the app on iOS
Follow along with the video below to see how to install our site as a web app on your home screen.
Note: This feature may not be available in some browsers.
More options
-
Welcome to the Yamaha MT-09 / FZ-09 Forums. Member registration disables ads and allows you to post and share. Register Here.
You are using an out of date browser. It may not display this or other websites correctly.
You should upgrade or use an alternative browser.
You should upgrade or use an alternative browser.
Chain oiler
- Thread starter timo5743
- Start date
Anthony1
0
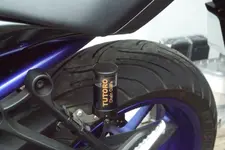
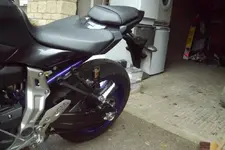
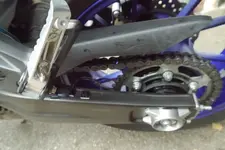
I have just bought a scottoiler V system with the dual injector. Hoping to fit it soon.
The tutoro does not look to bad there, Hooping to hide the scottoiler under the seat, but i will see what happens.
The tutoro does not look to bad there, Hooping to hide the scottoiler under the seat, but i will see what happens.

TJ63
0
I'm going to hide mine under the seat. There's a space which is spot on for the job. Just drill a small hole through the bottom of the tray where the toolkit fits, to connect the feed tube.
I'm still trying to find out how to get the vacuum feed without cutting a hose. Can't seem to find a blanking plug anywhere like there is on the MT-09.
I'm still trying to find out how to get the vacuum feed without cutting a hose. Can't seem to find a blanking plug anywhere like there is on the MT-09.

Timo Hi,
Can you share how it goes ?. What is the setting you have it on ? Do you use engine oil ?
Can you share how it goes ?. What is the setting you have it on ? Do you use engine oil ?
Last edited:
timo5743
0
Hi Amavro have it set on 2 works great using oil that comes with kit.
Thanks timo for sharing , mine is on the way .
Sent from my iPad using Tapatalk
Sent from my iPad using Tapatalk
Anthony1
0
Does anyone know where I can get a vacuum feed for the scottoiler? Hoping not to have to take the bike apart to fit it too.

Without meaning to stir up a hornets nest, is there actually a need for an oiling system on a modern chain, especially with the quality of the dry PTFE chain lubricants out there?
I remember reading somewhere that modern chains have sealed in lubricants where lubricant is needed, therefore, any lubricant added will only be on the surface and will not effect the free movement of the chain links.
I do appreciate that oiling is necessary to stop surface corrosion but again, the dry PTFE stuff does the job, lasts for ages and doesn't fling at all.
Worth looking into before you spend on an oiling system anyway.
I remember reading somewhere that modern chains have sealed in lubricants where lubricant is needed, therefore, any lubricant added will only be on the surface and will not effect the free movement of the chain links.
I do appreciate that oiling is necessary to stop surface corrosion but again, the dry PTFE stuff does the job, lasts for ages and doesn't fling at all.
Worth looking into before you spend on an oiling system anyway.
Anthony1
0
I will be travelling 2000 miles within 3 days, in British weather.
Hoping to get this fitted before then, otherwise it would be useless, and I agree for normal travels I would not really need one.
Hoping to get this fitted before then, otherwise it would be useless, and I agree for normal travels I would not really need one.


robodene
0
has anyone got any pictures of a fitted scottoiler esystem? I'm thinking of getting one but I think I will be struggling for space for the controller on the handlebars
Scottoiler themselves usually have instructions but I see they do not yet list the 07. Might be worth asking them if it's on the way
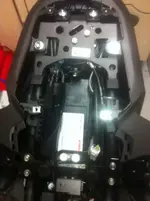
the eSystem installation instructions are on Scottoiler's website - the reservoir (predictably) is located under the seat and the controller is fixed inboard of the LH switchgear using an offset bracket - it doesn't look as tidy as I would have hoped!
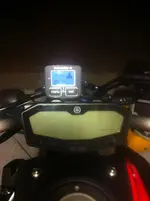
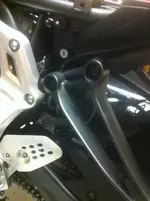
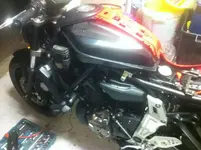
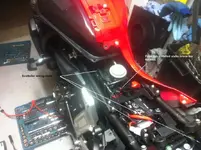
scottoiler esystem fitted! works a treat controller is in the best (temporary) position until I can source/make an offset bracket which shifts it to the left more. Fairly easy to install, slow to take off parts (it was a passage of discovery) but as soon as I sussed it out, the cable routing and pipework routing was easy enough and has resulted in what I think is a very neat/discrete install. I have the dual adapter fitted, it works brilliantly and has lubricated the chain as expected.
two things I noticed on installing
1. the tank's plastic body work rubs on the wiring loom which runs down the left hand side around middle of the seat position, I'm keeping an eye on it. I've done 2000 miles and the black outer pvc loom wrap has worn so the red PVC sheath of tone of the positive wires is visible.
2. at some point the chain has slapped the swing arm and taken the PPC coating off (only in a small area on a weld), I'm going to get a self adhesive neoprene chain guard (for mountain bike - lizard skins chain guard) to stick to the underside of the swing arm where the damage has occurred (yes the chain is correctly tensioned!).
View attachment 910
View attachment 911
View attachment 909
[View attachment 912
View attachment 908
two things I noticed on installing
1. the tank's plastic body work rubs on the wiring loom which runs down the left hand side around middle of the seat position, I'm keeping an eye on it. I've done 2000 miles and the black outer pvc loom wrap has worn so the red PVC sheath of tone of the positive wires is visible.
2. at some point the chain has slapped the swing arm and taken the PPC coating off (only in a small area on a weld), I'm going to get a self adhesive neoprene chain guard (for mountain bike - lizard skins chain guard) to stick to the underside of the swing arm where the damage has occurred (yes the chain is correctly tensioned!).
View attachment 910
View attachment 911
View attachment 909
[View attachment 912
View attachment 908
Attachments
TJ63
0
Neat job. It looks like you used the same route as I did with my v-system for the supply tubing.
cheers, not a lot of space under the pillion seat so tried to keep the install as compact and neat as possible, I tried a few different routes but the best was from the seat, down the left hand frame routed through to the hugger then through the hunger and down the swing arm. I wasn't too keen on cutting into the vaccum hose, it looks compact enough in their without getting my fat hands stuck in, so I went for the esystem.

badger27
0
Phone Scott oiler mark there will mail you pictures of where to mount it they are very helpful